Introduction Link to heading
This year I decided to put some personal time in learning reactjs. While I enjoy using Javascript for the frontend, I’d say that it’s not the language of choice for me for backend use. I don’t have anything against nodejs, but I prefer use java frameworks, which is the focus of my day job. So, I wanted to combine reactjs with Quarkus. A combination that just became more fun with the Quinoa. Quinoa allows users to use their favorite javascript framework with Quarkus with no additional configuration. On top of that it allows development of both backend and fronted from via the Quarkus dev mode. Last but not least it allows for native compilation that produces a single binary containing both fronted and backend.
This post demonstrates development using Quinoa. To make things more interesting it adds security into the mix. In particular it uses Keycloak as an identity provider and shows how frontend and backend can exchange information is a secure way.
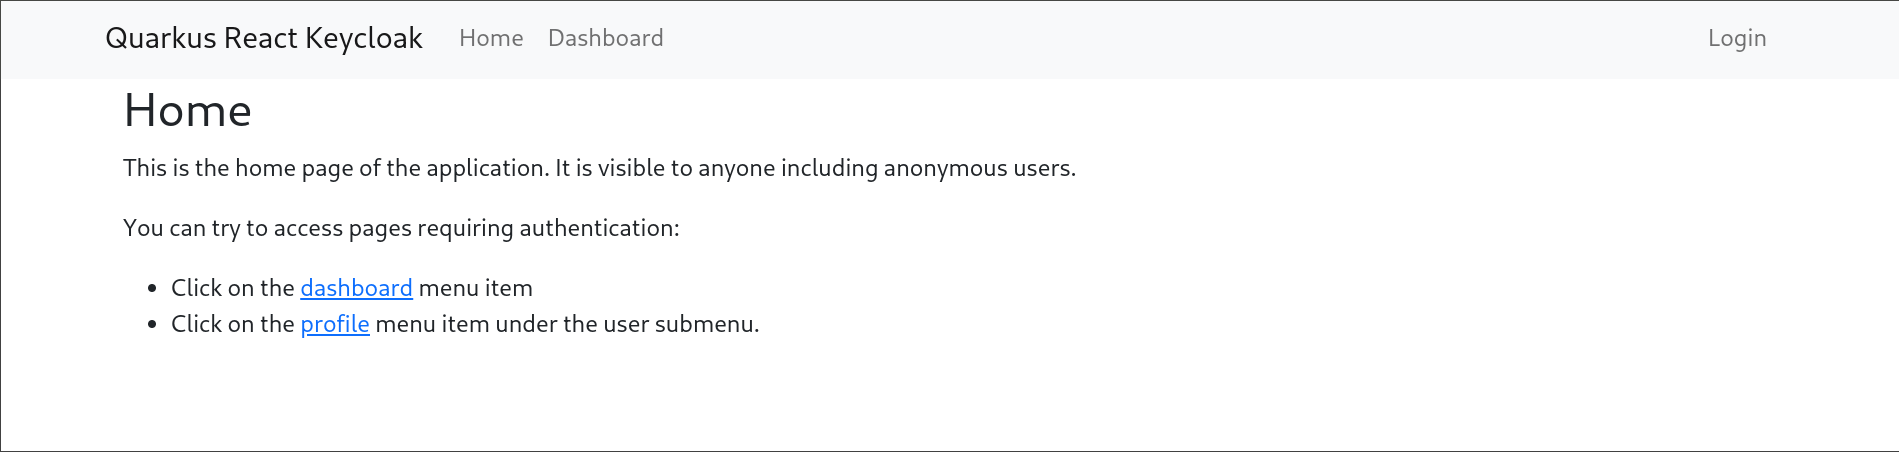
The end result is something like:
The full project can be found at: https://github.com/iocanel/quarkus-react-keycloak
Credits: The following demo https://github.com/dasniko/keycloak-reactjs-demo by Niko Kobler was really helpful and influencial for this post.
Challenges Link to heading
The main challenges that such a setup faces and addressed in this blog are:
- Starting Keycloak dev service configured with a public client (for frontend use).
- Keycloak discovery from the frontend.
- Frontend/backend communication using the token obtained from Keycloak
Getting started with Quinoa Link to heading
To create an empty Quarkus project using the Quinoa extension:
| |
The generated project has the structure shown below. It’s a regular Quarkus application with the addition of `webui` under `src/main`:
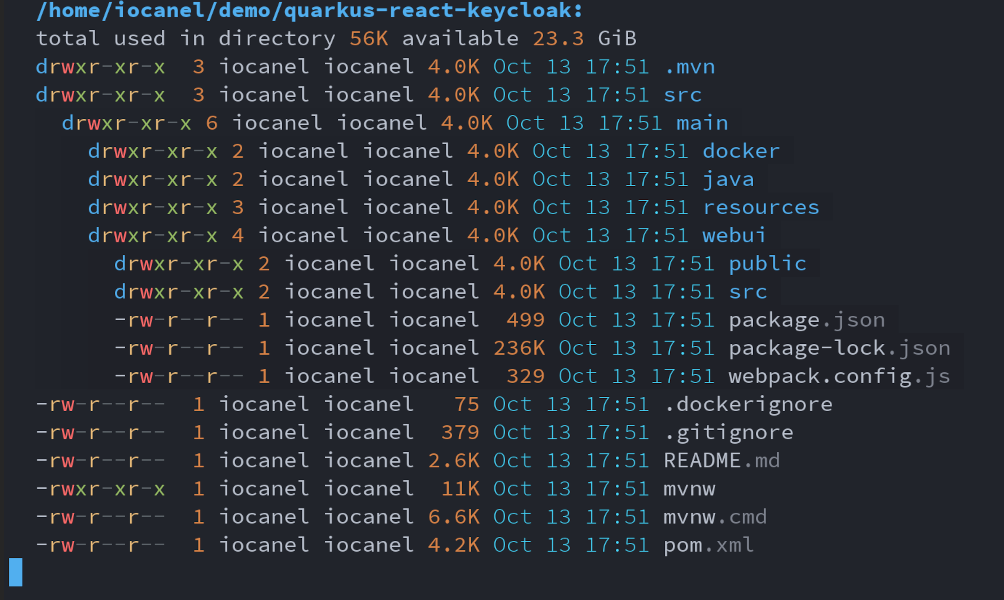
The `webui` folder is a traditional Javascript project.
Add the extensions for keycloak Link to heading
To be able to access the Keycloak Dev Services, we’ll need the following extension.
| |
Now, by running the application in dev mode, the Keycloak Dev Service is automatically started:
| |
Exposing Keycloak to the fronted Link to heading
The Dev Service for Keycloak passes as properties all configuration information needed for interaction with the service. The fronted however, is completely unaware. Let’s expose the information via rest. So, let’s add the `quarkus-resteasy-reactive-jackson` extension:
| |
Now, let’s add a resource that exposes Keycloak information. The info we need to expose is:
- The url
- The realm
- The clientId
| |
In theory we can live with just the `url` (it’s the only thing that is dynamic) and hardcode the rest in fronted. Let’s create a rest resource that uses the path `/api/keycloak/info.json` to expose the `Keycloak` info. That resource obtains the `url`, and `clientId` from the configuration populated by the Dev Service using the `@ConfigurationProperty` annotation.
| |
By accessing http://localhost:8080/api/keycloak/info.json you get something similar to:
| |
Before demonstrating what exactly we are going to do with this blob of json in the frontend, let’s configure which paths served by the front and which by the backend.
Single application routing Link to heading
To configure the routes served by the backend, let’s set `quarkus.quinoa.enable-spa-routing` to true.
| |
Setup the react application Link to heading
Let’s just delete the `webui` folder for now and create a new reactjs application from scratch:
| |
An alternative is to use a react template. I usually go with https://github.com/iotemplates/react-template which is a simple todo app and is setup with tests, github actions etc.
Add dependencies Link to heading
We need two additional dependencies:
- axios
- keycloak-js
1 2npm install --save axios npm install --save keycloak-js
Configuring the Keycloak client in Javascript Link to heading
To initialize the keycloak javascript client we need to fetch the `info.json` from the backend and pass it to the constructor. Then it’s just a matter of calling the `init` function with the proper configuration:
| |
The java developer in me feels compelled to encapsulate the keycloak client so, let’s wrap it in a class:
| |
Note, the `login` method. Calling that redirects users to the Keycloak login screen.
However, there is a detail that needs shorting out. The client needs to authenticate itself. Client authenticates with the use of a `clientSecret` or by configuring the Keycloak realm to allow for public clients. Given, that we are talking about the fronted, there is not much sense to use a secret so we need to configure the realm as private.
Configuring the realm Link to heading
Out of the box, the Keycloak Dev Services will create a realm with some sensible defaults. The generated realm however, does not allow public clients and also imposed some limitations on which are the origins allowed to use the service. Another options is to `bring your own realm`. The provided realm is ready to use. The only difference from the generated one, are the customization mentioned above. Additional customization is possbile by logging to the Keycloak instance as admin. The instance itself is accessible through the Quarkus Dev UI `http://localhost:8080/q/dev`.
By default the admin credentials are `admin` / `admin`.
After customization, the realm can be exported and passed to the Dev Service configuration.
In case you provide your own realm, make sure to also set `quarkus.keycloak.devservices.realm-path=` in the `application.properties`.
The login process Link to heading
With the realm properly configured, the `login` method of `KeycloakService` provided above, will bring up the login screen.
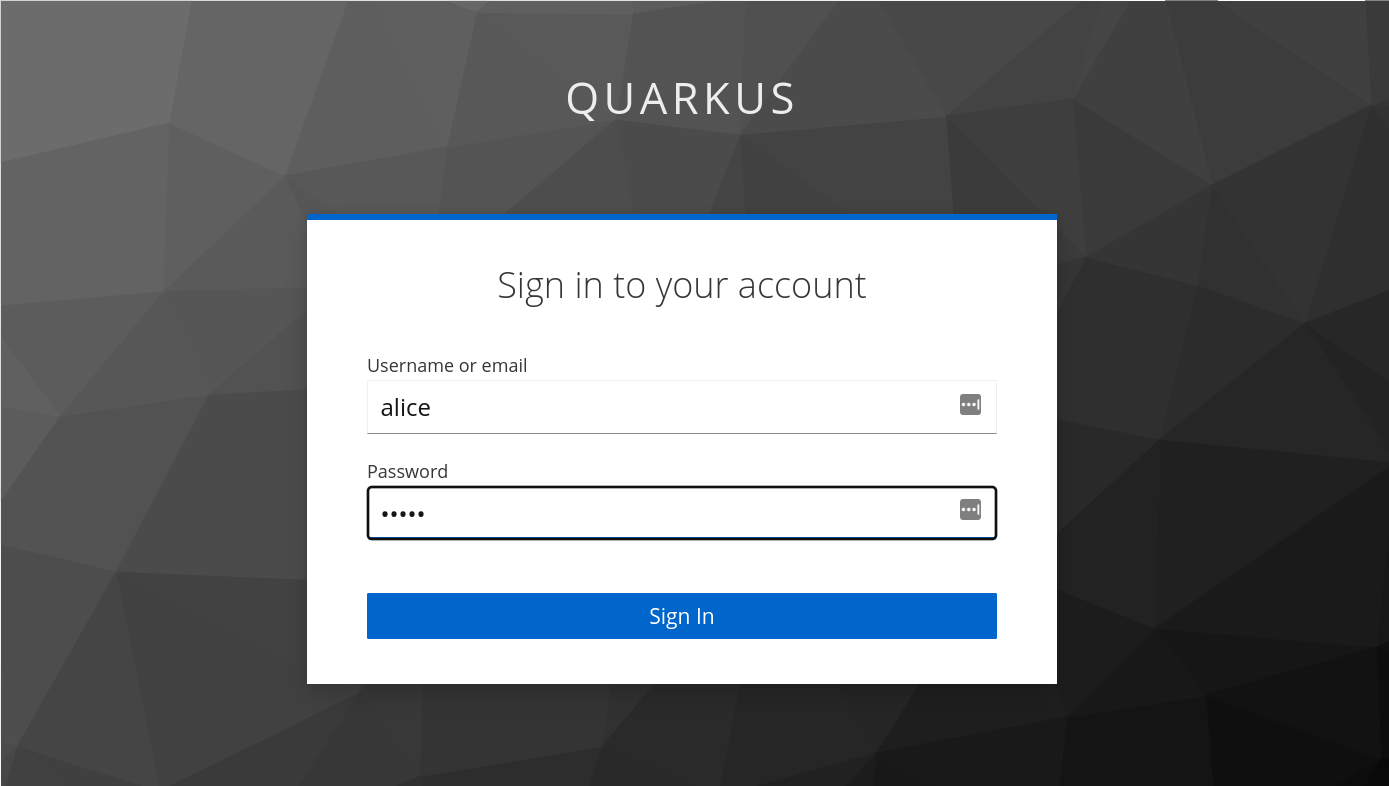
The provided realm comes with a user named `alice` that use `alice` as a password.
The only thing left is to configure the reactjs routes, so that login initiates, when the user is anonymous and tries to visit protected pages (e.g. `/dashboard` or `profile`). In jsx this is expressed like:
| |
The code is pretty straight forward, with only exception the `PrivateRoute`. The `PrivateRoute` is custom component that encapsulates The authentication logic. It uses the `userService` (which is actually the `KeycloakService` implemented previously) to check if user is logged in. If not, then the login process starts. In the opposite case the `Outlet` is displayed.
| |
Secure frontend / backend communication Link to heading
Securing things only the frontend is no good, if the backend is not. To secure the backend we need to two things:
- express which users / roles allowed to access which paths.
- pass authentication token obtained by Keycloak to the backend.
The former is trivial as Quarkus provides the security mechanism to support that. So, to get the profile information the backend, we can have a resource that allows authenticated users to grab the user info from the `SecurityIdentiy`;
| |
The other part, requires a little bit work on the frontend side of things so that http request to the backend include the `Bearer` header with the token as value.
For http, this blog is using axios. Let’s create a simple factory that creates an axios client. The factory uses two callback functions:
- getToken: to fetch the actual token.
- updateToken to update the token
The factory also defines the interceptor that sets the `Bearer` and refreshes the token when needed.
| |
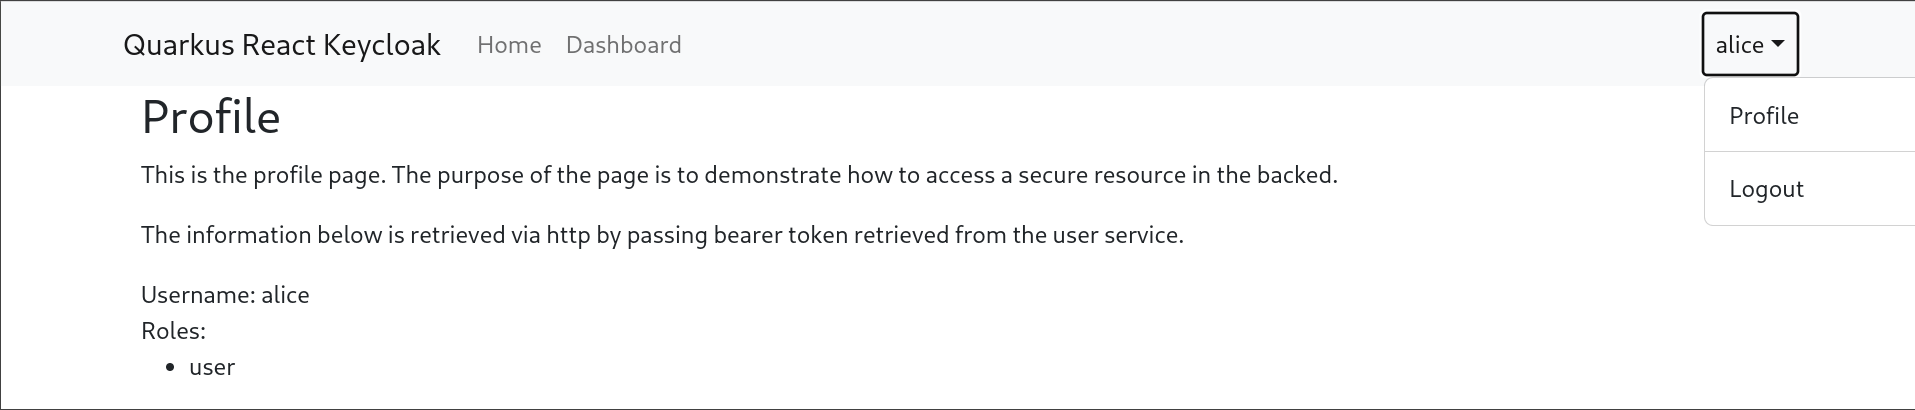
The profile component Link to heading
To demonstrate how the axios client is used in action let’s take a closer look at the profile component. The component when created, it uses the `AxiosFactory` to create axios. It passes the token callbacks provided by the `UserService` shown above. Then it uses the client to fetch users and roles from the `/api/user/me` that we just coded in the backed.
| |
The page should look like:
Closing Thoughts Link to heading
Using Quarkus with Quinoa simplifies working with javascript framework a lot as it uses a single project, build tool and development to work with everything. Dev Services further simplifies integration with external services, as developers no longer have to setup services by hand, docker compose etc. Keycloak provides a great way to deal with authentication, token etc by lifting that burden of the developers shoulder.